
For every hobbyist, painting Warhammer miniatures is one of the most rewarding parts of the hobby, but it can also be one of the most challenging. Whether you're just learning how to paint miniatures or refining your technique, even small errors can affect the final result.
In this guide, I'll cover 15 common miniature painting mistakes and show you how to avoid them, helping you achieve cleaner, more professional-looking models.
Miniature Preparation Mistakes Beginners Make
Proper miniature preparation is the foundation of everything that follows. It's often the most overlooked part of the hobby, yet it affects everything that comes afterward, from paint adhesion to the final finish.
1. Not Cleaning the Miniatures
Many hobbyists jump straight into assembly without considering how to clean miniatures before painting, a simple oversight that can sabotage a project before the first coat dries. To ensure your paint behaves correctly, keep these factors in mind:
- Removing Manufacturing Residue: Resin and metal models often carry a "mold release agent"—a slick substance that acts as an invisible barrier, preventing your paint from ever truly touching the surface.
- Neutralizing Skin Oils: During assembly, natural grease from your fingers transfers to the model, which often causes water-based acrylics to "bead up" rather than flow smoothly.
- The 5-Minute Fix: The most effective model prep involves a simple soak in warm, soapy water. A gentle scrub with an old toothbrush ensures your primer has a clean surface to bond to.
2. Skipping Mold Line Removal
Ignoring mold lines is among the most visible common miniature preparation mistakes, as these thin ridges become glaring imperfections the moment you apply color.
-
Defining the Ridges: These lines form where the two halves of a production mold meet. While subtle on bare plastic, they act as a "magnet" for washes and drybrushing, making them stand out as obvious flaws.

- Simple Cleanup: Learning how to remove mold lines from miniatures doesn't require a big budget; you can simply use the spine of a hobby knife or a tool kit to shave them flat.
- A Professional Finish: Dedicating a few minutes to this step during your model prep transforms the piece from a segmented toy into a solid, realistic sculpture.
3. Forgetting to Prime
Standard hobby acrylics are not formulated to bond directly to bare plastic or metal. Without an initial base, the paint has no "anchor," which is precisely why primer is important for miniatures.

- Creating "Tooth": Primer provides a microscopic texture that creates the necessary chemical and mechanical bond for your paint to stick and stay.
- Avoiding Patchiness: Attempting to paint without it leads to patchy coverage and accidental chipping, forcing you to use thicker layers that hide the model's fine details.
- Better Coverage: Whether you prefer a spray or a brush-on version, choosing a high-quality primer is a vital step in how to prepare miniatures for painting for a professional tabletop standard.
Common Miniature Paint Application Mistakes
Once your model is primed, the real challenge begins. This stage is where most beginners struggle with brush control and achieving a smooth, professional finish.
4. Applying Paint Too Thickly

The most important rule in the hobby is "two thin coats." Beginners often rush for full coverage in a single pass, which usually backfires.
- Losing Detail: Applying miniature paint too thick will clog fine details like facial expressions, armor filigree, and fabric textures, making the model look "goopy."
- The Thinning Process: To master how to paint miniatures with thin layers, always mix your acrylic paint with a drop of water on a palette until it reaches a smooth consistency.
- Building Up Color: Don't worry if the first layer looks transparent; a second thin coat will provide a solid, opaque finish without burying the sculpt under heavy paint.
5. Using Too Much Water
While thinning is essential, it is possible to over-dilute your paint. Finding the right balance is key to maintaining control.

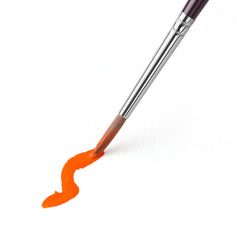
- Unintentional Washes: If the paint is too watery, it will run uncontrollably into the recesses, creating a streaky, weak finish rather than a solid coat.
- Ideal Paint Consistency: The best paint consistency for miniatures should feel like melted ice cream or skim milk—fluid enough to flow off the brush, but stable enough to stay where you put it.
- Identifying Errors: If the paint "beads up" on the model, you have used too much water. If it feels "draggy" or leaves ridges, it is still too thick.
6. Rushing the Base Coat

Patience is often more important than artistic talent when it comes to how to apply miniature paint evenly.
- Avoid "Tearing" the Paint: As acrylic paint dries, it forms a thin film. If you brush over a semi-dry area, you will rip this film, creating a permanent, grainy texture that is hard to fix.
- Wait for Total Dryness: Ensure each layer is 100% dry before starting the next. This is the simplest way to avoid brush marks on miniatures.
- Using Heat: If you are in a hurry, a hair dryer on a cool setting can safely speed up the drying process between layers.
Brush Care and Tool Mistakes
Your tools act as an extension of your hand. While they don’t automatically make you a better artist, using the wrong ones can definitely hold you back.
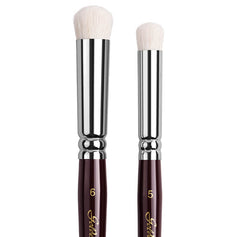
7. Using the Wrong Brush Size
New painters often fall into the "tiny brush trap," thinking a 000 detail brush is the only way to achieve precision.
- The Dry Paint Problem: Because tiny brushes hold very little liquid, the paint often dries on the bristles before it even touches the model, leading to a frustratingly chalky texture.
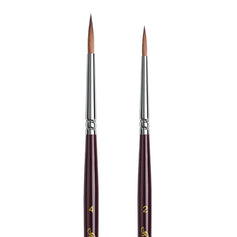
- The Power of the "Belly": The best brush size for miniature painting is usually a Size 1 or Size 2 with a high-quality sharp point. These have a larger "belly" that holds more moisture, keeping your acrylic paint fluid for longer.
- When to Scale Down: You should only reach for ultra-fine brushes for specific tasks like painting the whites of the eyes or intricate freehand heraldry.
- Making the Right Choice: Look for a brush with a sharp, resilient point and a significant reservoir, rather than just looking for the smallest tip available.
Choosing the right brush size for each layer will make your painting sessions much more efficient and less stressful.
8. Not Cleaning Brushes Properly
High-quality miniature brushes are an investment, but many beginners ruin them within a week through poor maintenance.
- Protecting the Ferrule: If paint reaches the "ferrule"—the metal part holding the hairs—it will dry and expand, forcing the bristles to splay out and destroying the point.
- Beyond the Water Pot: Learning how to clean miniature brushes involves more than just a quick rinse. You should never leave your brushes sitting tip-down in water.
- Conditioning for Longevity: Use a dedicated brush soap at the end of every session to remove deep-seated pigment and condition the bristles.
- Essential Brush Care: Following basic miniature painting brush care tips will save you a fortune in the long run and keep your tools performing like new.
9. Ignoring Helpful Tools
You don't need a thousand gadgets, but a few essential tools for miniature painting make life much easier.
|
Tool |
Why It Helps |
|
Wet Palette |
Keeps paint workable longer and improves consistency. |
|
Daylight LED Lamp |
Improves visibility and reduces eye strain. |
|
Miniature Painting Handle |
Improves grip, comfort, and brush control. |
Investing in a few key hobby tools creates a much more comfortable and controlled painting environment.
Wash and Shading Mistakes in Miniature Painting
Washes are often called "liquid talent" because they settle into cracks and create instant depth. However, they are easy to misuse, and a messy application can quickly overwhelm a good paint job.
10. Overusing Washes
The most frequent error for new painters is the "all-over wash," where the entire model is soaked in a dark liquid in hopes of a quick fix.
- Avoiding the Muddy Look: Slathering a model often results in a dirty, muted appearance that kills the vibrancy of your base colors.
- Targeted Shading: To shade miniatures properly, you should focus on "recess shading." This involves applying the wash specifically into the cracks and crevices, which preserves your mid-tones and maintains high contrast.
- Controlled Depth: By being selective with your application, you ensure the wash defines the muscles or armor plates without making the whole miniature look like it was dipped in oil.
11. Letting Wash Pool in the Wrong Areas
As washes are very thin, gravity often pulls them onto flat surfaces where they don't belong.
-
The "Coffee Stain" Effect: One of the most common wash mistakes in miniature painting is letting liquid sit on flat areas like shoulder pads or cloaks. As it dries, it leaves behind ugly, dark rings.

- Wicking Away Excess: The best way to avoid wash pooling is to keep a clean, damp brush nearby. Use it like a sponge to "wick away" any excess liquid that gathers in the wrong spots before it has a chance to dry.
- Active Monitoring: Always watch the model for a minute after washing; a quick correction while the paint is still wet can save you from a difficult cleanup later.
12. Skipping Highlight Planning
A wash is a great tool for creating shadows, but it is only one-half of the lighting equation.
- Beyond the Wash: Many beginners stop after shading, leaving the model looking flat and dark. A wash provides shadows, but it doesn't provide the light.
- Building the "Pop": To make your model stand out on the tabletop, you must go back and re-apply your base color to the raised areas, followed by thin highlights on the sharpest edges.
- The Role of Contrast: A vital miniature highlighting tip for beginners is to remember that high contrast is what makes a tiny 28mm figure look detailed from a distance. Without highlights, your shading efforts will often go unnoticed.
Miniature Finishing and Protection Mistakes
The paint job might be finished, but the project isn't truly complete until it’s protected. This final stage is where many beginners rush, potentially undoing hours of hard work with a few hasty decisions.
13. Forgetting Final Touch-Ups
Before you call it a day, do a "lap" around the model.
- Check for spots where you slipped and got green paint on a leather strap, or areas where the primer is still showing through.
- These final details are what separate a "good" model from a "great" one.
- Fixing these small errors before you seal the model is much easier than trying to fix them later.
14. Using the Wrong Varnish
If you plan on playing games with your models, you must know how to seal painted miniatures. However, the type of varnish you choose matters.
|
Varnish Type |
Appearance |
Best Use |
|
Matte |
No shine |
Most tabletop and display miniatures |
|
Satin |
Slight sheen |
Armor, leather, and general-purpose protection |
|
Gloss |
High shine |
Gems, lenses, wet effects, or metallic details |
- A gloss varnish will make your model look like wet candy, which is usually not the desired effect.
- Most painters prefer a matte or satin varnish for miniatures to give them a realistic finish.
- Always test your spray varnish on a spare piece of plastic first to ensure it doesn't "frost" or turn cloudy.
15. Handling the Miniature Too Early
Freshly painted models are fragile. Even if the paint feels dry, it hasn't "cured" yet.
- Curing is the process where the paint fully hardens and bonds to the surface, which can take up to 24 hours.
- Handling the model too early can lead to permanent fingerprints or chipped edges.
- Give your masterpieces a day to rest before you start moving them around the table.
Keep Practicing & Enjoy the Process
Mistakes are the best teachers in this hobby, so don't be afraid of a messy first model. The secret to better miniature painting is simple: thin layers, clean tools, and solid preparation. As you build stronger miniature painting techniques, every model you finish will be better than the last.
Now, it's time to put these tips into practice. Grab your brushes, thin your paints, and get that next project on the table. What's one painting habit you'll focus on improving in your next project?


