

We’ve all been there. You’ve spent hours assembling and priming your miniatures, and now you’re staring at a pile of grey plastic waiting to be painted. You want a tabletop-ready army today, not six months from now.
That’s where speedpaint enters the room. Designed to streamline the traditional, time-consuming multi-stage layering process, speedpaint lets you apply a single coat that flows across the model, tinting surfaces while creating natural highlights and shadows. It bridges the gap between speed and quality, giving your miniatures depth without forcing you to spend hours on each layer.
In this guide, we’ll explore how this innovative paint works, key techniques to master it, and how to avoid the common pitfalls of speedpainting miniatures.
What Is Speedpaint?
At its core, speedpaint is a type of miniature paint designed to add base color and create shading in a single application. Unlike traditional opaque acrylic paints, which often involve separate basecoating, washing, and highlighting steps to build depth, speedpaint uses a translucent formula.
When applied over a light-colored base coat, this translucency lets the underlying light show through the paint. The liquid naturally flows more thinly over raised areas and gathers in recesses, helping create contrast between light and shadow.

You’ve likely heard of Contrast Paints as well. Both speedpaint and contrast paints belong to this modern category of semi-transparent, contrast-style paints designed for rapid miniature painting.
While individual formulas vary between manufacturers—differing in flow rate, reactivation, and drying times—their core goal is identical: drastically reducing painting time without leaving your models looking flat or unfinished.
[product-card:1]
How Does Speedpaint Work?
Understanding how speedpaint behaves on a miniature’s surface is the key to getting cleaner, more consistent results.
How Speedpaint Creates Shading
When you brush speedpaint across a textured surface, the paint naturally gathers more heavily in recesses and settles more thinly over raised areas. Because the layer is thicker in recessed areas, the pigment appears darker, forming natural shadows.
Conversely, thinner layers allow more of the light-colored primer to show through, helping raised details stay brighter. This creates the impression of highlights without requiring you to paint each one separately.
The overall result depends on 3 factors: the physical surface texture of the model, how much liquid you load onto the brush, and the brightness of your underlying coat.
Why Your Primer Matters
Because speedpaint is semi-transparent, your choice of primer essentially acts as the "light bulb" underneath your paint layer.
- Pure White or Light Grey: Creates bright, vivid, saturated colors.
- Zenithal Priming: A technique where you prime the entire model in black or dark grey, then spray white primer from a top-down angle. This pre-establishes realistic light and shadow sources before a single drop of color is applied.
- Slapchop Technique: A popular underpainting method that builds on a dark base. You start with a dark base, heavy drybrush with a mid-tone grey, and finish with a light drybrush of pure white over the highest points. Applying speedpaint over a Slapchop underpainting creates dramatic, gritty contrast in seconds.
The Pros and Cons of Speedpaint
While speedpaint is a game-changer for batch painting, it isn’t a magic wand for every surface. Here is how it stacks up against traditional methods:
| Pros | Cons |
| Faster Basecoating: Completes base colors and initial shading in one step. | Primer Dependent: The final color is strongly affected by the tone and quality of the primer. |
| Instant Shading: Automatically helps define shapes by gathering in recesses. | Pooling Risks: Excess paint can pool unexpectedly if not monitored. |
| Texture-Friendly: Excels on detailed sculpts (fur, chainmail, cloth). | Patchiness on Flat Surfaces: Can leave tide marks or streaks on large, flat surfaces. |
| Ideal for Batching: Speeds up painting large units for tabletop games. | Selective Highlighting: Fine edge highlights still require additional manual steps. |
How to Use Speedpaint for Better Results
For better results with speedpaint, focus on controlling the paint while it’s wet and giving each layer enough time to dry.
Prepare Your Miniature and Primer

Start with a smooth, even application of primer. Specks, dust, or grainy primer texture will cause the paint to pool awkwardly. Pick a light undercoat or Zenithal base that matches the warmth or coolness of your planned color scheme. If you are trying out a new color combination, always test it on a spare bits-box piece or test miniature first.
Apply the Paint with Control

Load your brush with enough paint to cover the surface smoothly. However, control is crucial:
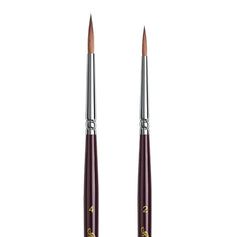
- Use a medium-sized round brush with a sharp point to guide the paint where you want it.
- If fluid gathers in a deep puddle where you don't want it, gently touch the excess with your brush. The bristles will wick up the extra paint like a sponge.
- Crucial Rule: Work while the paint is still wet. Once it begins to dry, avoid brushing back over the same area, as this can tear the paint film and leave rough textures. If you spot a pool, lift the excess paint before it starts to set.
Let Each Layer Dry

Patience pays off here.
Let each section dry completely before applying an adjacent color. Touching a wet speedpaint area with a different color can cause the pigments to bleed into each other, muddying your crisp lines.
Tips: Drying times vary by formula and conditions, so follow the paint manufacturer's guidance rather than relying on a fixed time.
Common Speedpaint Mistakes and How to Fix Them
Even experienced painters run into trouble with translucent paints. Here are quick solutions to common speedpaint mistakes:
| Common Mistake | How to Fix It |
| Too much paint pooling in recesses | Use a clean brush to wick away excess paint before it begins to dry. |
| Patchy or uneven coverage | Ensure your primer is smooth; avoid brushing over areas that have already started drying. |
| Colors look too dark | Switch to a brighter white primer or brighten your Slapchop drybrushing pass. |
| Flat surfaces lack definition | Edge-highlight large flat panels using opaque paints once the underlying speedpaint is dry. |
Take Your Speedpaint Further with Acrylic Highlights
The beauty of modern miniature painting techniques lies in mixing mediums. You don't have to limit yourself to a single layer of speedpaint.
Once your speedpaint base is completely dry, reach for traditional acrylic paints to take your model to the next level:
- Edge Highlighting: Use standard acrylics to trace the sharpest edges, faces, and upward-facing surfaces.
- Cleaning Flat Armor: Apply a thin layer of traditional acrylic over flat armor plates where speedpaint might have left faint tide marks.
- Refining Details: Use opaque acrylics for tiny freehand details, eyes, or metallic accents.
By combining speedpaint for rapid basecoating and shading with traditional acrylic paints for crisp highlights, you get the absolute best of both worlds: extreme speed without sacrificing visual punch.
Getting Better Results with Speedpaint
Speedpaint won’t do every job for you, but it can take much of the repetition out of painting an army. Start with a good undercoat, learn to control the flow, and add a few acrylic highlights where they matter most. You might be surprised how much character you can bring to a miniature in a fraction of the usual time.
Are you working on a specific army or miniature right now? Let me know what you're painting, and I can suggest the best underpainting style or color combination for your project!