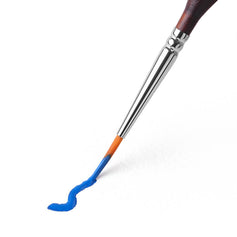

What Are Miniature Highlights?
In miniature painting, highlights refer to the lighter color layers applied to areas of the model that receive the most light. These are typocally added after the basecoat and shading are completed, using a color that is lighter and of higher contrast than the basecoat. Because miniatures are so small, actual light has minimal effect on the model, painters simulate real-word lighting by highlights.

Why Miniature Highlights Matter in Painting
Enhances form and contour: Highlight increase brightness on protruding surfaces,edges,and folds,making the model's structural boundaries and contours clear and pronounced.
Improves visibility at a distance: On the tabletop or in a display case,miniatures are often viewed from a distance. Highlights ensure that details remain visible and distinct even when the model is not examined up close.
Simulates different materials and lighting: Various materials(mental,fabric,skin) reflect light differently. Highlights help differentiate these materials.By controlling a highlight's brightness,edge hardness, and area, a painter can convey different textures and material properties.
Draws viewer focus: Highlights naturally attract the eye to key areas of the miniature, effectively guiding attention to focal points.
Compensates for scale limitations: Miniatures(common scales include 28mm,32mm,35mm) are too small for realistic lighting by broad sources.Painting highlights and shadows compensates for this, ensuring the model appears fully three-dimensional under normal lighting conditions. By applying miniature highlights according to logical lighting, the figure is made to fit convincingly into a realistic scene.
Types of Miniature Highlighting Techniques
There are several standard techniques for applying highlights on miniatures:
Edge Highlighting
Edge highlighting involves applying a lighter color along the sharp edges of the model where light would naturally strike, using a fine brush stroke. This technique makes the edges appear crisp and illuminated.
Common locations for edge highlights:
- The outer edges of armor plates
- The corners of weapons and armor
- The edges of mechanical components
- Sharp folds in cloth
How to edge highlight:
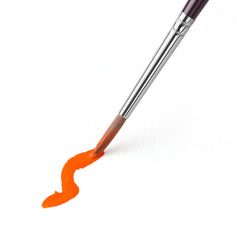
Select a color lighter than the basecoat(not necessarily white, but a lighter hue). Gently run the brush along the edge to be highlighted. Only edges facing the light source require highlighting. An additional very small bright dot can be placed at the sharpest corner for emphasis. Use an appropriately sized brush: too large and the highlight will flood the area, too small and it may not hold sufficient paint.
Layer Highlighting
Layer highlighting is a gradual build-up technique. It involves applying multiple thin layers of paint that progressively transition from the base color to the highlight color, resulting in a smooth and natural light effect.
How to layer highlight:
- Apply a uniform basecoat to the target area.
- Thin the highlight color with water or a medium and apply it lightly to the raised areas.
Important: Allow each layer to fully dry before adding the next. Each successive layer should cover a slightly smaller area than the previous. This approach creates a smooth gradient from shadow to highlight.
- Prevent blocky transitions by ensuring each new layer is only marginally lighter than the one beneath it. Decrease the coverage area with each layer(leaving parts of the previous layer visible) to achieve a seamless color blend.
- Apply the paint in very thin layers,overly thick paint will obscure the layers underneath and produce unnatural transitions.
- Use a gentle back and forth or feathering stroke from the bright area into the darker area to soften the edges between layers.

Dry Brushing Highlights
Drybrushing is most effective for textured surfaces(such as stone, chainmail, or fur). It is not recommended for large flat surfaces, as dry brushing emphasizes texture rather than flat planes.
How to dry brushing
- Dip a dry brush into paint.
- Wipe off the majority of the paint on a paper towel or palette, leaving only a small amount on the bristles.
- Lightly brush the raised detail of the model. The paint will adhere only to the texture's peaks, naturally highlighting them.
Glazing Highlights
Glazing involves applying a very thin, translucent layer of paint over another layer so that, once dried, it subtly alters the underlying color. Highlight glazing uses this technique to adjust color density and blend edges, making highlights appear more luminous and softly integrated.
How to glaze for highlights
-
Choose an appropriate paint color (often a darker shade).
- Thin the paint significantly (approximately a 1:9 ratio of paint to water or medium is common). If the paint is too thick, it will cover the base instead of blending.
- Remove excess paint if necessary. Highly thinned paint flows readily, so blotting off extra helps prevent unwanted pooling.
- Apply the glaze layer over the desired area. The first application may show minimal change; subsequent thin glaze layers will progressively alter the appearance.
- Allow each glaze layer to dry completely before applying the next.
Spot Highlighting
Spot highlighting targets the highest point of a model where light is most intense (e.g., the tip of a nose, a finger joint, or the top of a shoulder). It involves placing a very small, bright dot to simulate a specular reflection.
How to spot highlight
- Add a small amount of white (or a subtle warm or cool tint) to your final highlight color to enhance its brightness.
- Use an extremely fine-tipped brush (size #00 or #000) with minimal paint loaded.
- Gently dab the paint onto the model at the chosen point. Do not stroke back and forth; instead, press and lift the brush in place.

Choosing the Right Colors for Miniature Highlights
When selecting highlight colors, remember three core principles: the highlight should be lighter in value, more saturated, and often slightly shifted in color temperature relative to the base.
The goal of highlights is to simulate light reflection, and creating contrast with the surrounding color is key:
- Value Contrast: This is the primary factor. The highlight’s value (brightness) should be considerably higher than the surrounding area. For example, a pale tan highlight on dark brown leather or a light blue-gray on black armor will immediately draw the eye and emphasize the object's contours.
- Temperature Contrast: For lifelike results, the highlight is often shifted slightly in warmness or coolness from the base color. For instance, a warm base color might receive a slightly cooler highlight, or vice versa. These subtle warm/cool differences within the same hue family maintain overall color harmony while preventing a flat or cartoonish appearance.
- Saturation Contrast: Highlights are typically more color-pure (vibrant) than the areas around them. If surrounding areas are dull or muddy, a pure highlight will stand out and prevent the miniature from looking dull.
Miniature Highlight Color Guide: The final highlight color can be thought of as a product of the light source’s color, the material’s reflective properties, and the environment.
-
Metal: Metal surfaces reflect light strongly and pick up environmental colors (for example, the blue of the sky). Thus, even under warm lighting, metal highlights may contain cooler tones. Many painters intentionally use slightly cooler highlight colors on metal to emphasize its hardness and shine.
Note: Warm-toned metals (like brass or gold) will produce warm highlights when lit by warm light. Warm highlights contribute to a “warm, vintage” feel for these materials. - Skin: Skin is translucent, so light penetrates and scatters before reflecting back out. The highlight (a combination of the skin’s inherent color and reflected light) naturally has a warm tone, even under cooler light sources.
- Cloth: Fabric highlights represent light scattering on a textured, diffuse surface. The highlight color is influenced by both the fabric’s base color and the light’s color temperature. Generally, fabric highlights tend to be relatively neutral (not as warm or cool as metal or skin highlights) due to the diffuse reflection from the fibers.

Best Brushes for Miniature Highlights
Key brush characteristics for highlighting:
- Fine Point: The bristles must naturally taper to a fine point
- Good Spring: The brush should spring back quickly after each stroke to ensure smooth, precise lines.
- Water/Paint Control: Especially when using very thin paint (glazing), the brush should not suddenly release water or paint from the ferrule.
Match the brush to the highlighting technique:
-
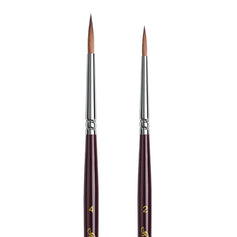
Edge highlighting: Requires a brush with an extremely steady, springy fine tip (e.g., sizes 0 or 1) to draw crisp, clean lines along hard edges.
-
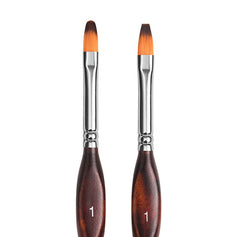
Layer highlighting: Use a brush with a sharp point and a sufficient belly to hold a modest amount of paint (e.g., sizes 1 or 2) for applying repeated small highlights.
-
Spot highlighting: Requires an exceptionally fine, high-quality brush (e.g., size #00 or #000 Kolinsky) with excellent paint control to create tiny highlights without flaring.
-
Glazing: Use a brush with soft bristles and even paint flow to achieve smooth, translucent layers.
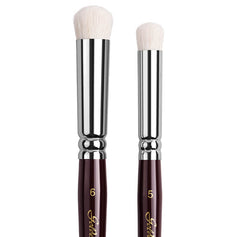
- Dry brushing: Use a medium-sized short-bristle brush or a dedicated drybrush with stiff bristles and good rebound to lightly catch texture details without saturating flat surfaces.
Step-by-Step Guide: Highlighting Miniatures
Follow these steps to apply highlights effectively:
1. Determine the light direction: Establish the direction of the primary light source. Highlights should be applied only to surfaces facing the light. Surfaces turned away from the light should remain in shadow, possibly with subtle ambient or reflected highlights.
2. Choose the highlight color: Select a highlight color whose value is higher (lighter) than the mid-tone. This value contrast defines the model’s form. Once the value difference is set, adjust the hue and color temperature as needed.
3. Build highlights gradually: Highlights should appear as a series of bright spots that become progressively smaller and brighter. Begin with a small highlight area and gradually expand or intensify it. Avoid attempting the full highlight in a single stroke.
4. Evaluate overall contrast: Step back from the model (1–2 meters away) and squint to assess whether the bright, mid, and dark areas are clearly differentiated. Photographing the model and examining it in grayscale can help confirm that the lighting structure reads correctly and the highlights “pop.”
Frequently Also Question
Q:What are volumetric highlights?
Volumetric highlights are used to convey the three-dimensional shape of a surface under lighting. They involve varying brightness and color so that an entire lit surface reads as volume, rather than just adding a single bright spot. This makes the model appear more solid and realistic.
Q:How can I enhance metal surfaces with highlights?
For metal surfaces, employ strong contrast between the base color, mid-tones, and highlights to emulate reflective behavior. Use edge highlighting along sharp metal edges and add small spot highlights on corners or protrusions. Adjust the highlight’s color temperature (cooler or warmer) to enhance realism and suggest environmental reflections.
Q:Is dry brushing suitable for fine details?
Dry brushing is most effective for broad textures and raised surfaces (e.g., chainmail, hair, stone). It tends to be too rough for very fine edges or intricate details. The recommended approach is to use dry brushing for general texture highlights, and then refine the fine details using layering or edge highlighting for precision.


