
The Pain Point: Why Your Miniatures Look "Rough"
Have you ever struggled with visible white stress marks after clipping parts from the sprue? Or noticed stubborn pits and uneven textures even after sanding? A rough surface can ruin a high-quality paint job, which is unacceptable for those aiming for the prestigious Golden Demon. Smoothness is the essential foundation for advanced painting techniques.
This video provides a step-by-step guide on perfecting your model kits. Learn how to use single-blade nippers and sanding sponges to eliminate nub marks and achieve a professional, flawless finish.
Clipping from the Sprue: Start with the Right Tools
The first step is removing parts from the plastic sprue. Traditional nippers often crush the plastic, causing white stress marks. To avoid this, you need a high-quality single-blade nipper.
How Single-Blade Nippers Work
Unlike standard nippers, single-blade versions feature one ultra-sharp cutting edge and one flat anvil.
The Principle: Using a lever action, the sharp blade slices through the plasic like a razor while the flat side provides support. This results in a clean, flat cut that minimizes stress and discoloration.
3-Step Clipping Process
The Initial Cut: Leave a few millimeters of the gate(the plastic connecting the part to the sprue). Never cut flush against the model immediately, as the pressure can cause pitting or whitening.
The Precision Trim: Gradually trim away the remaining gate until only a tiny nub remains.
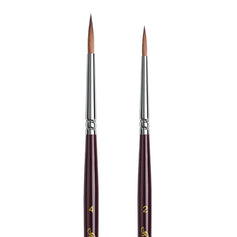
Graduated Sanding: Using sanding sticks to level the surface. For painters, start at 800 grit and move to 1000 grit. If you are building without painting ("plastic fit"), continue with 1200 and 1500 grit for a seamless finish.
Removing Mold Lines: Details Define Success
Mold lines are the faint seams formed where the two halves of a mold meet during production. They are most common on arms and legs.
The Risk: These lines become glaringly obvious during highlighting,shading,or dry brushing. They must be removed before any primer is applied.
Removal Techniques:
Scraping: Use the back of a hobby knife or a dedicated Games Workshop(GW) Mold Line Remover.
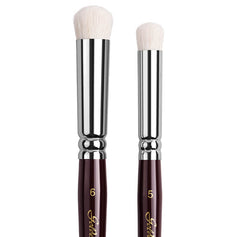
Sanding: Use fine-grit sandpaper for flat areas. For curved surfaces, always use sanding sponges to maintain the model's natural contours; hard files or sanding sticks can create unwanted flat spots.
Fixing Gaps and Damage
Accidental nicks or gaps in "push-fit" or multi-part kits can ruin the silhouette of your miniature.
Filling Tools: Use A+B Epoxy Putty(like Miliput or Green Stuff) or plastic cement.
The Workflow:
Fill the gap or hole with putty.
Allow sufficient time for the filler to cure completely.
Once dry,sand the area smooth with a file or sandpaper.
Don't Foget Joints: Ensure all glued seams are sanded down so the transition between parts is invisible.
Conclusion
Surface preparation is the most critical stage of miniature painting. A smooth model is your "canvas". By using professional single-blade nippers, graduated sanding, and precise gap filling, you set yourself up for success.
Remember: achieving a perfectly smooth finish is a mandatory requirement for anyone chasing the legendary "Slayer Sword" at GoldenDemon.


