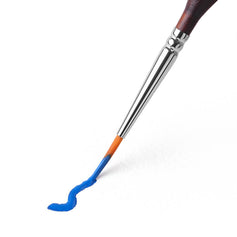

A good basecoat sets the tone for the rest of your miniature painting. If the paint is uneven, too thick, or patchy, those problems can become more noticeable as you add shading and highlights.
The good news is that basecoating miniatures does not require complicated techniques. With the right paint consistency, brush control, and layering approach, you can achieve clean coverage while keeping the details of the model sharp.
What Is Basecoating in Miniature Painting?
What Is a Basecoat?
In miniature painting, a basecoat is the initial layer of color applied over a primed model. It establishes the main colors for areas such as armor, skin, cloth, leather, and weapons.
The goal of a miniature basecoat is to achieve consistent coverage while keeping fine details sharp. Once the base colors are established, you can move on to washes, layers, highlights, or other techniques.
Basecoat vs. Primer: What’s the Difference?
Primer and basecoat have different jobs.
- Primer prepares the plastic, resin, or metal surface for painting and provides a surface that helps subsequent layers adhere properly. It also gives you an initial color or tone to work over.
- A basecoat is the colored paint applied over the primer. In simple terms, primer prepares the miniature for painting, while the basecoat establishes its actual colors.
The Golden Rules of Basecoating
Good basecoating techniques focus on 3 things: paint consistency, thin layers, and enough drying time between coats.
The Thin-Coat Principle
Avoid trying to achieve full coverage with one thick layer. Instead, apply several thin coats and build the color gradually.
Thin layers are less likely to obscure details or leave raised texture on the surface. Two thin coats are a useful starting point, but the exact number depends on the paint's opacity and the color underneath.
Paint Consistency and Coverage
Many acrylic paints need some thinning before use, but there is no single ratio that works for every paint and color.
Add a small amount of clean water or acrylic medium on your palette and adjust until the paint flows smoothly from the brush while still providing good coverage. It should not feel thick or leave heavy ridges on the miniature.
Why Drying Time Matters
Let each coat dry before applying the next one. Brushing over partially dry paint can disturb the layer underneath and create streaks, patches, or unwanted texture.
Thin acrylic layers often dry within a few minutes, but drying time varies with the paint, layer thickness, temperature, and humidity. If necessary, a hair dryer on a cool or low-air setting can speed things up. Keep it at a distance so strong airflow does not disturb the paint.
Working from the Inside Out
When you basecoat miniatures, working from recessed areas toward raised surfaces can make cleanup easier:
- Recessed areas: skin, eyes, and inner clothing.
- Middle layers: armor plates, belts, and outer garments.
- Raised details: weapons, capes, and accessories.
Later layers can cover small mistakes made on areas underneath, giving you cleaner transitions between different parts of the model.
How to Basecoat Miniatures Step by Step
1. Prepare Your Paint and Brush

Place a small amount of your chosen color onto a wet palette or other suitable palette.
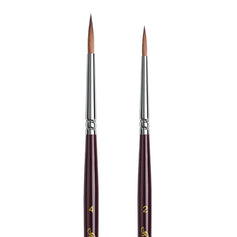
A medium round brush with a good point is a practical choice for basecoating. A size 1 or 2 can hold enough paint for larger areas while still giving you control around edges and details.
2. Thin Your Paint

Mix the paint on your palette and add a little water or acrylic medium if needed.
Test the paint on your palette or another surface before applying it to the miniature. It should flow smoothly without feeling overly thick or immediately running into recesses.
3. Start With Hard-to-Reach Areas
Begin with areas that are difficult to access later, such as the face, inner clothing, or spaces between armor plates.
Use the tip of the brush to guide paint into tight areas, but avoid letting it pool in recesses.
4. Apply the First Thin Coat

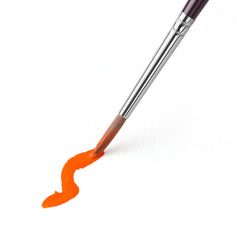
Spread the paint evenly across the surface using controlled strokes. The first coat may look slightly translucent or patchy, especially with colors that have lower coverage.
Do not add more paint while the layer is still wet. Let it dry first, then judge whether another coat is needed.
5. Let It Dry and Add Another Coat

Once the first layer is completely dry, apply another thin coat using the same controlled approach.
The second coat will usually improve opacity and even out the color. Some colors, particularly yellow, orange, and white, may need additional thin coats.
6. Check Coverage and Clean Up

Inspect the miniature under good lighting. Look for missed spots, uneven coverage, or paint that has crossed an edge.
Correct small mistakes with the neighboring color before moving on to shading or highlighting.
Common Basecoating Problems and How to Fix Them
Even with the right technique, a few common problems can still affect your basecoat. Here are the most common issues and simple ways to fix them.
|
Problem |
Common Cause |
How to Fix It |
|
Thick or Uneven Paint |
Paint is too thick, too much paint is loaded onto the brush, or too much pressure is used. |
Adjust the paint consistency and apply thinner layers. If dried paint has heavily obscured details, stripping and repainting may be the cleanest solution. |
|
Patchy Coverage |
Uneven application, insufficient coats, or brushing over partially dry paint. Dark primer can also make low-opacity colors appear patchy. |
Let the surface dry completely, then apply another thin coat. A lighter undercoat can also help improve coverage. |
|
Visible Brush Strokes |
Paint is too thick, too much paint is applied, or the paint starts drying while you work. |
Adjust the consistency and avoid repeatedly brushing an area as it begins to dry. In a dry environment, a small amount of suitable acrylic medium or retarder can extend working time. |
|
Paint Covering Fine Details |
Too much paint on the brush or paint pooling in recesses. |
Remove excess paint before applying it to the miniature. If paint pools in a recess, use a clean, relatively dry brush to wick away the excess while it is still wet. |
|
Paint Spilling Over Edges |
Rushing, poor brush control, or a damaged brush tip. |
Work slowly around important edges and keep your brush properly shaped. Small mistakes can usually be corrected with the adjacent base color. |
Basecoating Miniatures FAQ
Q1: How many coats should a basecoat have?
Two thin coats are a useful starting point for many acrylic paints, but there is no universal number. Paint opacity, pigment, primer color, and the desired finish all affect coverage. Some colors may need three or more thin coats.
Q2: Should you thin paint for basecoating?
Often, yes. Many miniature paints benefit from some thinning, but the ideal consistency varies by paint and color. Add a small amount of water or acrylic medium and adjust based on how the paint flows and covers.
Q3: What brush is best for basecoating miniatures?
A medium round brush with a sharp point is a versatile choice for basecoating miniatures. A size 1 or 2 offers a good balance between paint capacity and control.
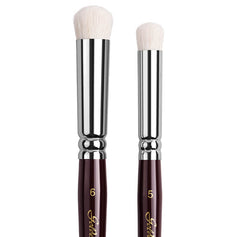
For larger areas, a larger brush can speed up the process, while smaller brushes can be useful for very tight sections.
Q4: Why is my basecoat patchy?
Patchiness can come from uneven application, paint that is too thin or too thick, insufficient coats, or painting over a layer before it has dried.
Let the surface dry completely, then apply another controlled, thin coat rather than trying to correct the problem with a heavy layer.
Q5: Can Contrast or Speedpaint replace a traditional basecoat?
Contrast paints and Speedpaints can provide color variation and shading in a single application, particularly over a light-colored undercoat.
Traditional flat basecoats, however, give you more control over coverage, color placement, and the final finish. The better option depends on your painting speed and the level of control you want.
Build a Better Basecoat
A smooth basecoat gives every miniature a stronger starting point. Keep your paint at a workable consistency, build coverage with thin coats, and give each layer enough time to dry. With these simple habits, you can achieve cleaner colors and preserve the details that make your miniature stand out.
Take your time with the basecoat, and the techniques that follow will become much easier. Pick up your brush, build your base colors, and start painting with confidence.