
Dry brushing is one of the most iconic and widely used highlighting techniques in miniature painting, scale modeling, and crafts. It uses minimal paint and light sweeping strokes to emphasize raised textures, bring out details, and create realistic depth—especially on small-scale models where light and shadow are difficult to simulate.
Miniatures often have tiny sculpted textures that are hard to highlight with traditional painting. Dry brushing naturally deposits color on raised surfaces while leaving recessed areas darker, creating instant contrast and enhancing realism. This guide covers everything you need to know: what dry brushing is, how dry brush tools differ from regular brushes, how to choose the right brush, and step-by-step instructions for mastering the technique.
What Is a Paint Dry Brush?
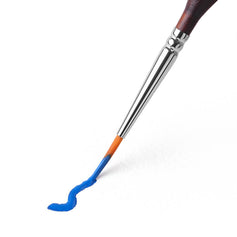
A paint dry brush is a specialized brush designed to deliver soft, controlled highlights using minimal paint. Instead of flowing strokes used with wet paint, dry brushing relies on gentle sweeping motions that deposit pigment only on raised textures. For miniature models, this technique dramatically enhances sculpted details and adds lifelike depth.
How Dry Brushes Differ from Regular Brushes?
- Bristles: Typically goat hair or firm synthetic fibers for durability.
- Shape: Often domed or flat for smooth surface brushing.
- Technique: Uses almost dry paint instead of fluid strokes.
Regular brushes quickly fray under dry brushing motion, while dry brushes are designed to withstand repeated lateral friction and maintain their shape.
Dry Brushing vs. Washing: Key Differences
Both dry brushing and washing enhance contrast, but they work in opposite ways.
- Dry Brushing
Dry brushing is a popular miniature painting technique that uses almost no water, keeping the paint thick and easy to control. By gently dragging a nearly dry brush across the surface, the paint is applied only to raised areas, such as edges and textures. This method is ideal for highlighting fine details, increasing brightness, and enhancing surface texture without overwhelming the base color, making it especially effective for armor, fabric folds, and terrain details.

- Washing
Washing is a technique that uses highly diluted paint to create smooth, natural shading effects. The thin paint flows easily into recesses, panel lines, and crevices, where it settles as it dries. This process adds shadows and definition while preserving surface detail, making washes essential for creating depth, contrast, and realistic transitions on miniatures and models.
 Simply put:
⭐ Dry brushing brings out highlights.
⭐ Washing deepens shadows.
When to Use Dry Brushing
Dry brushing is ideal when you need to emphasize texture or subtly brighten raised areas on a model.
Common scenarios include:
- Stone, wood, leather, fur, and cloth textures
- Armor edges, mechanical parts, and worn surfaces
- After washing to restore contrast
- Creating natural weathering, dust effects, and edge wear
Dry brushing is also one of the fastest ways to improve tabletop-quality miniatures.

How to Choose the Best Paint Dry Brush
The performance of dry brushing depends significantly on selecting the right brush. Let’s examine the four key factors: bristle type, shape, size, and ergonomic design.
Brush Hair Types
✔ Goat Hair (Most Versatile)
Goat hair brushes are soft and fluffy, allowing paint to be applied smoothly for natural, gradual highlight transitions. They are ideal for fabrics, organic surfaces, and subtle textures where a gentle, blended effect is desired.
✔ Synthetic/Nylon Bristles
Goat Synthetic or nylon bristles are firm with strong elasticity, making them perfect for sharper, high-contrast highlights. Their durability and easy cleaning make them especially well-suited for metal edges, armor plates, and mechanical components.
✔ Hog Bristle
Hog bristles are extremely stiff and coarse, providing strong abrasion against the surface. They are best reserved for terrain pieces and rough textures and are not recommended for fine miniature details due to their lack of control.
Brush Shapes
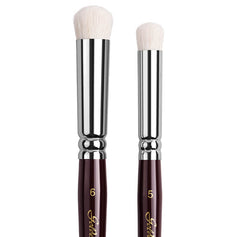
✔ Dome Round (Most Popular)
- Curved and rounded surfaces: Perfect for cloth folds, weapon edges, and cylindrical mechanical components, allowing natural dry brushing along curves.
- Precise highlights on raised textures: The bristles gradually taper from the center to the edge, enabling precise highlight placement on the peaks of textures while maintaining consistent pressure and stroke angle.
- Soft gradient transitions: The dome shape naturally creates smooth edge gradients, especially effective for small areas or detailed work.
- Complex or irregular surfaces: Ideal for gears, pipes, or recessed details where a standard round brush cannot maintain consistent contact.
Versatile and precise—perfect for curves and fine details. View Dome Round Drybrush
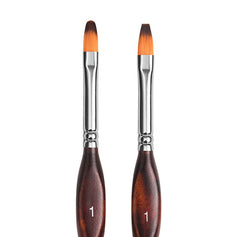
✔ Flat
- Large surface dry brushing: Ideal for armor plates, walls, floors, or large mechanical panels, allowing you to cover more area in a single stroke and improve efficiency.
- Straight lines and edge highlights: The edge of the brush can evenly apply highlights on raised lines or flat edges, especially suitable for straight or regular textures.
- Smooth gradient effects: With evenly arranged bristles, flat brushes create soft highlight gradients on broad surfaces, avoiding visible brush strokes.
- Narrow or irregular flat areas: For wider surfaces with slight irregularities, flat brushes maintain stable contact and reduce the need for repeated strokes.
Fast and even—ideal for large flat surfaces. Shop Flat Drybrush
✔ Angle
- Directional dry brushing on armor panels, cloth folds, weapon edges, and mechanical components
- Targeted highlight placement on raised textures where consistent pressure and repeatable stroke angle are required
- Gradient edge transitions, achieved by leveraging the brush’s varying bristle lengths
- Accessing awkward or irregular surfaces where a standard round or dome brush cannot maintain consistent contact
Controlled and flexible—great for tricky angles.Explore Angle Brush

Brush Size — Choosing the Right Size for the Right Task
Choosing the correct brush size ensures smooth transitions, prevents over-highlighting, and provides the necessary control depending on the model’s surface.
✔ Large Dry Brushes — For Terrain & High-Texture Areas
Used when you need broad, soft highlights:
- Stones, terrain bases, ruins
- Large monsters or creatures
- Cloaks, capes, and wide armor sections
✔ Medium Dry Brushes — The Most Versatile Option
The ideal choice for general miniature painting:
- Clothing folds
- Fur, hair, scales
- Leather, weapons, and armor panels
✔ Small Dry Brushes — For Precision & Fine Detail
Perfect for areas where accuracy matters:
- Facial highlights (nose, brow, cheek bones)
- Small ornaments, rivets, and insignias
- Tiny armor trims or accessories
⭐ How to Select the Right Size
Large: broad textures, fast coverage
Medium: everyday dry brushing tasks
Small: pinpoint highlights and precision work
A multi-size set ensures flexibility and smooth transitions between different parts of a miniature.

Ergonomic Brush Design
Long painting sessions require comfortable, easy-to-control brushes. Good dry brushes often include:
- Ergonomic handles that reduce hand strain
- Anti-slip grips (triangular or matte designs) for stability
- Lightweight short handles for better precision and closer control
Ergonomic design helps maintain consistent highlight pressure and prevents fatigue
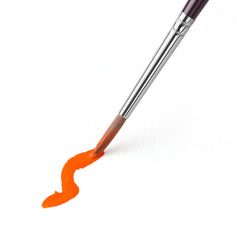
How to Dry Brush (Step-by-Step Guide)
Step 1: Prepare Your Brush
Use a clean, completely dry brush with the appropriate size and bristle type.
Step 2: Load the Paint
Lightly dip the brush into the paint, then wipe off about 90% of it on a paper towel so that the brush looks almost “empty.”
Step 3: Apply the Technique
Lightly brush across the raised textures using gentle, sweeping motions to gradually build up the color.
Step 4: Layer Highlights
Start with mid-tone highlights → lighter highlights → final edge highlights.

Brush Care & Maintenance
Dry brushes undergo heavy friction, so proper care is essential:
- Clean with cold water and mild soap
- Avoid harsh scrubbing
- Shape the bristles after washing
- Let the brush air-dry naturally
- Store upright to maintain tip integrity
Regular care prolongs performance and prevents premature fraying.

Conclusion
Dry brushing is a simple yet powerful technique that instantly elevates miniature models by enhancing texture, contrast, and realism. With the right brush—selected by bristle type, shape, size, and ergonomic design—you can produce professional-quality highlights with minimal effort.
Whether you're painting fantasy miniatures, scale models, tabletop armies, or terrain pieces, mastering dry brushing will dramatically improve your results.
Frequently Asked Questions (FAQ)
Q1: Can I use regular paintbrushes for dry brushing?
A1: You can, but it's not recommended.
Regular detail brushes—especially sable or soft watercolor brushes—will fray quickly because dry brushing uses horizontal scrubbing instead of fluid strokes. Specialized dry brushes are more durable and provide smoother highlight transitions.
Q2: Why does my dry brushing look chalky or dusty?
A2: Chalky highlights usually mean you're using too much paint or too bright of a color.
To fix this:
- Remove 90% of the paint before brushing
- Use lighter shades of your base color instead of pure white
- Build highlights with multiple thin layers
Q3: Can dry brushing be used with acrylics only?
A3: Dry brushing works with acrylics, oils, inks, and enamels, but acrylics are the most common because they dry fast and produce clean, controllable highlights. For miniatures, water-based acrylics are strongly recommended.


