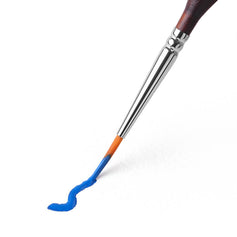

Painting miniatures can feel tricky at first. Tiny details, shaky highlights, uneven paint — we’ve all been there. The good news? A few solid miniature painting techniques can instantly improve your results.
Whether you're painting fantasy armies, tabletop heroes, or display pieces, learning the basics will save you time and frustration. From miniature preparation to smooth highlights, this guide covers the techniques every painter should know.
Miniature Preparation and Priming Basics
Before you even touch a brush, you need to handle the "unboxing" phase. Skipping prep work is the fastest way to ruin a potentially great paint job.
Removing Mold Lines and Cleaning Models

Most plastic models have small imperfections called mold lines, which are thin ridges left over from the manufacturing process.
- Scrape these off gently with a high-quality hobby knife or a specialized remover.
- If left alone, these lines become glaringly obvious once you apply paint or washes.
- Clean your models in warm, soapy water to remove factory oils that might prevent paint from sticking.
Choosing and Applying the Right Primer
Once the model is clean, it is time for the most important first step: priming. A good miniature primer gives the paint something to grip onto, preventing it from chipping or peeling off the smooth plastic later.
- Black Primer: Perfect for beginners as it naturally fills deep recesses with shadows.
- White Primer: Use this if you want bright, vibrant colors to pop instantly.
- Grey Primer: The best neutral choice that doesn't fight against your basecoats.
- Pro Tip: Spray in short, controlled bursts from 8-12 inches away to avoid clogging fine details.
Why Thinning Acrylic Paint Matters
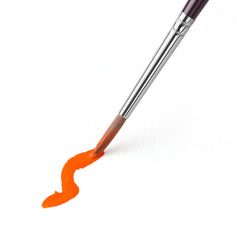
The "golden rule" of the hobby is simple: always thin your paints. Straight out of the pot, acrylic paint is usually too thick and will obscure the model's detail.
The "Skim Milk" Rule: How to Thin Acrylic Paint
Learning to get a smooth basecoat on miniatures without brush strokes starts with the right consistency. You want your paint to behave like melted ice cream or skim milk.
- Never paint directly from the pot; always move a small amount to a palette first.
- Mix in a drop of clean water until the paint flows smoothly without being watery.
- Applying two thin coats is always better than one thick, clumpy layer.
Benefits of Using a Wet Palette
To make your life easier, I highly recommend using a wet palette for miniatures. This simple tool keeps your paints moist and usable for hours.
- It prevents paint from drying out while you work on large squads.
- It makes mixing custom colors much more efficient and less wasteful.
- A wet palette is the best tool for maintaining that perfect, thin consistency throughout your session.
Shading and Highlighting: Creating Instant Depth and Contrast
Once your base colors are down, your model might look a bit flat or "cartoony." To fix this, you need to simulate how light and shadow work in the real world.
The Miniature Washing Technique
Washes are heavily diluted, ink-like paints designed to flow into the cracks and crevices. Many hobbyists call this "liquid talent" because of the instant depth it provides to the model’s details.
- This works effectively thanks to a physical principle known as capillary action. Because the wash has low surface tension, the tiny recesses of the miniature naturally "pull" the pigment into the deepest shadows.
- Brush the wash over the area, ensuring it settles into the deep recesses for instant definition.
- Pro Tip: Learn how to apply a wash to miniatures without coffee staining by wicking away excess liquid with a damp brush before it dries on flat surfaces.
- Don't let the wash "pool" in large blobs, or it will ruin the smooth finish of your basecoat.
Dry Brushing and Edge Highlighting for Texture

After shading, you need to bring the brightness back to the raised edges. Dry brushing miniatures is the fastest way to highlight textures like fur or stone.
- Use an old, flat brush and wipe almost all the paint off onto a paper towel.
- Lightly "dust" the brush over the model to catch only the highest points.
- For sharp armor, use edge highlighting to trace the thinnest lines with your brush tip for extra definition.
Advanced Miniature Painting Techniques
If you want to take your work to a competition-winning level, you’ll need to explore more complex essential miniature painting techniques.
Glazing Miniatures for Realistic Skin and Glows
Glazing miniatures involves applying extremely thin, transparent layers of paint to slowly change a surface's hue.
- It is the go-to method for creating smooth skin tones or glowing energy effects.
- Your glaze should be so thin it looks like tinted water on your palette.
- Build up the color intensity slowly over 5 or 6 layers for a perfect gradient.
The Wet Blending Technique for Speed and Softness
Another high-level skill is the wet blending technique. Unlike glazing, which requires layers to dry, wet blending happens while the paint is still fresh on the model.
- Apply 2 different colors to the model at the same time and mix them where they meet.
- This allows you to create smooth color transitions on large areas like capes or monster skin in a single session.
- Keep your brush damp and work quickly before the acrylics have a chance to dry and tear.
Introduction to Non-Metallic Metal (NMM)
NMM is the art of using regular greys and yellows to trick the eye into seeing shiny steel or gold. It is often considered the pinnacle of essential miniature painting techniques.
- This requires a fundamental understanding of light and reflection principles, especially concerning how light interacts with metallic surfaces.
- Many pros spend hours chasing the secret to painting NMM gold for a realistic metallic look.
- The key is extreme contrast—blending from nearly black shadows directly into pure white highlights.
Storytelling Through Details: Weathering, Faces, and Bases
A model isn’t truly finished until it tells a story. Whether your hero is trudging through a muddy trench or a pristine forest, these final details ground them in the real world.
Weathering and Battle Damage Techniques

Weathering miniatures is the best way to add character and history to your work. It shows that your character has actually been through a battle rather than just stepping off an assembly line.
- Battle damage techniques: Use a small sponge to dab dark brown or metallic paint onto edges to simulate worn-down armor and scuffs.
- Add rust effects to metal pipes or streaks of mud to the bottom of a cloak to show the grit of combat.
- Keep it subtle—a little bit of "mess" goes a long way in adding realism.
How to Paint Realistic Eyes for 28mm Models
Faces are the focal point of any model, and eyes are the most intimidating part.
- Wondering how to paint realistic miniature eyes for 28mm models? Start with a very fine-tipped brush and steady breathing.
- Paint the eye socket a dark color first, then add a tiny dot of off-white.
- Keep your paint thin to avoid "bulging" eyes that look startled.
Easy Basing Ideas for Miniatures
The base is the "frame" for your artwork. A well-decorated base makes even a simple paint job look professional.
- Use custom basing kits and textures like sand, static grass, or tufts to build a scene.
- A consistent basing theme across your entire army pulls the collection together visually.
Essential Tools and Care for Your Miniature Painting
To keep your skills sharp, you need to take care of your gear. High-quality tools make these essential miniature painting techniques much easier to execute.
Choosing the Best Brushes for Miniature Painting
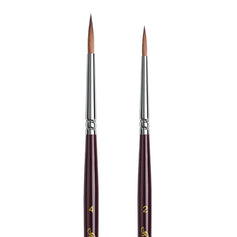
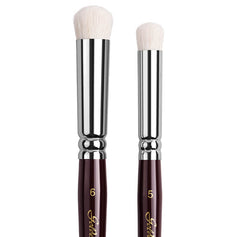
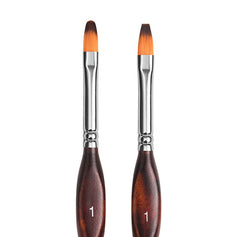
If you are still asking, "What are the best brushes for miniature painting for beginners?" the answer is usually a smart mix.
- Use affordable synthetic brushes for rough tasks like basecoating and dry brushing.
- Save one high-quality Kolinsky sable brush specifically for fine detail work.
- This hybrid approach keeps your expensive brushes sharp for when they matter most.
Brush Maintenance and Protecting Your Work
Proper brush maintenance is vital. Never let paint dry in the ferrule (the metal part), as it will ruin the tip.
- Clean your brushes with specialized brush soap after every session.
- Finally, use a miniature varnish (matte or satin) to seal the paint.
- Varnish prevents oils from your skin or accidental bumps from chipping the paint during a game.
Frequently Asked Questions (FAQs)
Q: How long should I wait before varnishing a painted model?
A: Wait at least 24 hours before applying miniature varnish. If the paint still feels tacky, give it more time.
Q: Why does my miniature paint look chalky or clumpy?
A: This usually happens when the paint is too thick or dries too quickly. Try thinning acrylic paint and applying lighter coats.
Q: Black vs white primer: which one should you choose for basecoating?
A: Black primer works best for darker themes and shadows, while white primer helps bright colors look more vibrant.
Q: What is the best water-to-paint ratio for thinning miniatures?
A: A good starting point is around 1:1, but it depends on the paint brand and technique.
Enjoy Your Miniature Painting Journey
Mastering essential miniature painting skills is a journey, not a sprint. You'll have messy models, and you'll have masterpieces. The key is to keep your paints thin, your brushes clean, and your imagination open.
Ready to start your next project? Whether you need the perfect primer or a professional-grade brush set, we have everything you need to transform your grey plastic into a work of art. Happy painting!