
Miniature painting is more than a hobby — it's where creativity meets precision.
From Warhammer 40k armies to D&D characters, every model starts as plain plastic and becomes a unique piece of art. But for beginners, getting started can feel overwhelming.
What brushes should you use? Why does your paint look chalky? How do you paint fine details like eyes?
This complete miniature painting guide will walk you through the essential tools, techniques, and tips you need to paint miniatures with confidence.
Your Essential Miniature Painting Tools
To paint like a pro, you need more than just a steady hand. From precision cutting to the final stroke of a fine-detail brush, every tool plays a vital role in your success.
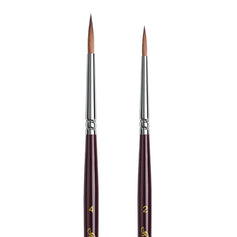
Miniature Brushes

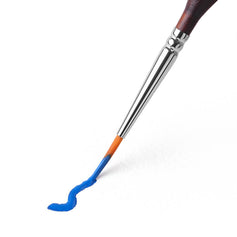
Your brush is the bridge between your imagination and the model. For miniatures, you need brushes that offer a perfect "snap" and a needle-fine point. Choosing the right brushes builds a solid foundation for every step in your hobby workflow.
Natural vs. Synthetic
Choosing between natural and synthetic brushes is one of the first decisions you'll make.
- Kolinsky Sable brushes are generally considered the best for miniature painting. They hold a good amount of paint and have a sharp point, which makes blending and detail work a lot easier.
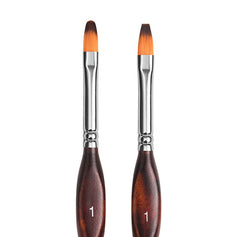
- Synthetic brushes are also good and less expensive and harder to damage. Good for base coating and for use with metallic paints or anything else that might damage a good sable.
Must-Have Brush Sizes
For most miniature painters, round brushes will handle almost everything.
- Size #1 or #2 (Round): Great for base coating and general work. Holds more paint, which helps keep your layers smooth.
- Size #0 or #00 (Round): Ideal for edge highlights and smaller details.
- Size #000 (Fine Detail): Useful for tiny details like eyes or fine lines — but harder to control if you're new.
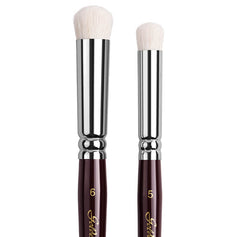
- Flat/Stiff Brush: Be suited for Drybrushing, particularly on textures like fur, stone, or armor.
If you're just starting out, a small set with a size #1, #0, and a detail brush will cover almost everything you need for miniature painting.
Miniature Paints
For the best results on your models, always use specialized hobby acrylic paints rather than standard craft paints, with quality paint selection key to great results. These are formulated specifically for the small scale of miniature painting, offering better coverage and smoother finishes.
- High-quality acrylic mini paints contain a higher concentration of pigment, ensuring vibrant colors even when thinned down.
- The refined formula flows easily into recesses without clogging the delicate textures and fine details of your miniature.
- These paints are designed to be easily thinned with water, allowing for the smooth, multiple layers needed for a professional look.
Painting Handle
Holding a model directly can lead to shaky hands and accidental smudges. A dedicated painting handle is a staple among miniature painting tools because it offers a secure, ergonomic way to grip your project.

- The handle provides a firm grip for your entire hand, which greatly reduces tremors when you are working on tiny details.
- It keeps your fingers away from the surface, preventing natural skin oils from interfering with how your mini paints adhere to the primer.
- Most handles allow you to rotate the miniature easily, helping you reach difficult angles without ever needing to touch a wet painted area.
Wet Palette
A wet palette is one of the most essential miniature painting tools for keeping your colors workable during long sessions. It consists of a sponge and permeable paper that keeps your mini paints hydrated from underneath.

- The constant moisture prevents your acrylics from drying out on the palette, allowing you to use the same mix for hours or even days.
- A damp surface makes it much easier to achieve professional miniature painting techniques like wet blending and glazing.
- Since the paint stays fresh longer, you will end up wasting significantly less material over the course of your hobby projects.
Other Tools
Beyond the brushes, ensure your desk is equipped with these essentials:
| Tool | Why It's Important |
|---|---|
|
Precision Clippers |
Used to cleanly remove parts from the plastic sprue without tearing the material or leaving ugly stress marks. |
|
Hobby Knife |
Essential for cleaning up mold lines and carving out fine details for a perfectly smooth surface before painting. |
|
Daylight LED Lamp |
Provides consistent and clear lighting to prevent eye strain and ensure you see the true colors and shadows of your work. |
|
Miniature Glue |
Necessary for assembling models securely, with plastic cement for plastic kits and super glue for resin or metal pieces. |
|
Miniature Primer |
Creates a textured surface that helps acrylic paints stick evenly and prevents the finish from chipping during handling. |
|
Two Water Jars |
One is used for rinsing off dirty paint while the second stays clean for thinning your colors to ensure your palette stays fresh. |
How to Prepare Miniatures Before Painting
Now that you have the right tools, let's prepare your miniature properly.
Choose the Right Miniature
If you're just starting out, it helps to pick a model that's slightly larger with simpler, clearer details. Tiny, super-detailed pieces look amazing, but they can be tricky to handle and paint neatly, which might feel frustrating at first.
It also helps to think about the material used in miniatures:
- Plastic miniatures are lightweight, affordable, and easy to cut and glue—great for beginners.
- Resin models often have sharper, more detailed sculpts but can be more fragile.
- Metal miniatures feel sturdy and heavy, though they're a bit harder to trim and position.
Stick to plastic or simple resin if you're still getting the hang of things.
Clean Your Miniature
Wash your model in warm, soapy water before painting. This helps remove any release agents that can prevent paint from sticking.
If needed, use a hobby knife to remove mold lines for a smoother surface. Taking care of these small imperfections early will make your painted finish look much cleaner.
Assemble the Miniature
If your miniature comes in multiple pieces, glue them together using an adhesive that matches the material.
Plastic cement melts and bonds plastic parts together securely, while super glue (cyanoacrylate) works better for resin and metal miniatures.
Press pieces gently into place and let the glue dry completely. Rushing this step can lead to wobbly parts or messy smudges once you start painting.
Prime the Miniature
Always use a primer before adding any color. Primer creates a slightly toothy surface that helps paint adhere evenly, prevents chipping, and makes your colors look more vibrant.
A grey primer is a versatile pick for most projects—it works well with both light and dark paints and lets you easily see details as you work. Apply thin, even coats rather than one thick layer to avoid covering up small details.
Once your miniature is clean, assembled, and primed, you're all set to start bringing it to life with paint.
Basic Color Theory
Understanding basic color theory is key to elevating your miniature painting and making your models stand out. It helps you choose harmonious mini paint colors that fit your themes.
The Color Wheel
The color wheel is a visual representation of mini paint colors arranged in a circle. It shows the relationships between primary, secondary, and tertiary colors to help you master miniature painting.

- Primary Colors: Red, yellow, and blue. All other shades in miniature painting are built upon these three foundations.
- Secondary Colors: Green, orange, and purple. These are created by mixing two primary colors together on your palette.
- Tertiary Colors: These are made by mixing a primary color with a neighboring secondary color for more complex model painting color blending.
Essential Properties of Mini Paint Colors
When learning how to choose paint colors for miniatures, you must understand the three core properties that define every shade. These properties directly impact how light and shadow appear on your model.
- Hue: The specific type of color like red or blue. This is typically used as your base color for the largest areas of the model.
- Value: The lightness or darkness of a color. This is the most critical property for creating the high contrast needed to make small models look lifelike.
- Saturation: The purity or intensity of a color. Use high-saturation colors for focal points and lower saturation for larger areas to guide the viewer's eye.
Classic Color Schemes for Your Models
Using the color wheel helps you find the best color mixing for Warhammer 40k or fantasy projects. Choosing a proven scheme ensures your colors work together seamlessly rather than clashing.
- Complementary Colors: Hues opposite each other on the wheel that offer the highest contrast. This scheme makes your miniature painting pop and catch the eye.
- Analogous Colors: Neighbors on the color wheel that create a natural, cohesive look. These are perfect for achieving a realistic or subtle aesthetic on your characters.
- Triadic Schemes: Three colors equally spaced on the wheel. This delivers a vibrant and stylized result that makes a bold statement on the tabletop.
The "60-30-10" Golden Ratio for Color
Many professional artists follow this golden ratio to distribute colors effectively. It balances visual pressure and ensures a professional finish for any miniature color theory project.
- 60% Main Color: This covers the largest areas like armor or cloaks. It sets the overall tone and foundation for your entire piece.
- 30% Secondary Color: Used for supporting areas like pouches or leather straps. This adds depth without competing with the main color for attention.
- 10% Accent Color: A high-saturation shade for tiny details like eyes or gems. This should contrast with the rest of the model to draw the viewer's eye.
Expert Tips for Color Temperature and Contrast
Color temperature enhances dimension and conveys emotion through your mini paint colors. Mastering these small details will quickly elevate your skills from beginner to advanced.
- Temperature Contrast: Use warm tones for areas hit by light and cool tones for shadows. This simple trick creates a strong sense of three-dimensional depth.
- Shadow Secrets: Avoid using pure black for shadows. Instead, mix in cool tones like deep blue or purple to keep your miniature painting looking vibrant and clean.
- The Grayscale Test: Take a black and white photo of your model. If the sections are still easy to distinguish, your value contrast is strong and your colors will look great.
Step-by-Step Painting Techniques
The Golden Rule: "Thin Your Paints"
If you take only one thing from this guide, it's this: don't use paint straight from the pot.
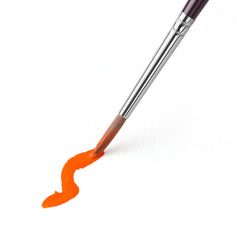
Try thinning it down until it feels more like milk. Thicker paint tends to hide small details like chainmail or faces, while thinner layers go on smoother and look much cleaner. It might take an extra coat or two, but the result is worth it.
Base Coating
Start by laying down your main colors across the model. A slightly larger brush (#1 or #2) will make this process much easier and faster.
You do not need to be extremely precise during this stage. Just focus on building an even and smooth base layer for your work.
Drybrushing
Dry brushing is probably one of the easiest techniques to get good-looking results, especially for textures.
Use a flat, stiff brush. Dip it in paint, then wipe almost all of it off on a paper towel until only a faint dust remains. Lightly flick it across the model. It will catch only the raised edges, perfect for stone, fur, and weathered metal.
Washing
Washes are designed to flow into the crevices and recesses of your model. They add natural depth and shadow with very little effort.
One thing to keep in mind is that too much wash on flat surfaces can create uneven patches. If this occurs, use a clean damp brush to gently remove the excess wash and tidy the area.
Layering & Edge Highlighting
Once your shading is finished, go back over the model with your original base color. Paint over the main surfaces while leaving the shaded areas untouched.
For edge highlights, use a lighter shade of your base color. Learning pro techniques for clean miniature highlights will sharpen every detail, and a size #0 or #00 brush with a fine point will make this detailed work much simpler to control.
How to Paint Fine Details
Faces are the most noticeable part of any miniature. A well executed face can elevate your entire model and give it character and life. Here are some practical tips to help you paint eyes and faces with confidence.

- Paint the eyes first. It is much simpler to add skin tones around completed eye details than to paint small eye shapes inside a finished skin area. This order also reduces the risk of smudging or ruining your work with corrections.
- Use the side of the brush tip. Avoid stabbing the surface with the sharp end of your brush. Use the edge of your fine detail brush to gently form the pupil. This method gives you better control and creates smoother, more consistent shapes.
- Keep your hands stable. Touch your wrists together to form a steady support structure. This simple trick reduces small hand tremors and helps you make clean, accurate strokes. You can also rest your arm on the table for additional steadiness.
- Work with thin paint. Even for small details, thick paint will clump and blur fine lines. Thin layers let you build up color gently and achieve crisp, professional results.
Take your time and correct as needed. If a stroke is not perfect, let the paint dry and touch it up with your base color. With a little practice, you can create expressive faces that make your miniatures stand out.
Common Miniature Painting Mistakes
Even experienced painters make small errors. Learning to avoid these common mistakes will help you get cleaner results and enjoy the process more.
| Problem | Likely Cause | The Fix |
|---|---|---|
|
Chalky/Grainy Finish |
Paint was too thick or white primer was sprayed in high humidity. |
Thin with "Acrylic Medium" instead of just water; check weather before priming. |
|
Paint Peeling Off |
Model wasn't washed or primed. |
Always wash resin/metal and never skip the primer. |
|
Brush Tips Curling |
Paint dried in the "ferrule" (the metal neck). |
Never dip your brush past the halfway mark of the bristles. |
|
Obscured Details |
Too many thick layers. |
Strip the mini in 99% Isopropyl Alcohol and start over—it's part of the learning process! |
Post-Paint Care: Protecting Your Masterpiece
Painting doesn't really end with the last highlight. A few simple steps at the end can make a big difference in how long your miniatures and brushes last.
Varnishing for Miniatures
Once your miniature is fully dry (wait 24-48 hours for thick layers to cure), applying a varnish is non-negotiable for long-term protection, especially for tabletop gaming miniatures that see regular handling.
- A matte varnish is the go-to choice for most projects: it seals paint, prevents chipping, and eliminates unwanted shine for a natural, professional finish.
- For eye-catching focal points (like eyes, glass, slime, or gemstones), add a thin layer of gloss varnish only to those areas. The contrast makes details pop and adds a realistic, polished touch.
- Always apply thin, even coats (2-3 thin layers > 1 thick one) to avoid obscuring fine details or creating a cloudy finish.
Safe Storage & Display
After spending hours on your miniature painting, you would like to keep it safe from dust and accidental drops. Safe storage is just as important as your painting.
- Display Cabinets: Keeping your miniatures in a glass cabinet is a good idea, as this way, your miniatures are safe from dust, and you can also enjoy them every day.
- Transport Cases: If you go to a local store to play with your minis, use a case to keep them safe from knocking against each other and scratching off the paint.
Regular Miniature Maintenance
Even after varnishing, regular upkeep keeps your miniatures looking their best, especially for frequently used gaming pieces.
- After each gaming session, gently wipe miniatures with a soft, dry brush or cotton swab to remove dust, dirt, or oil from handling.
- Inspect miniatures for chipped paint or wear, and touch up damaged areas with your original base colors, then re-seal with a thin layer of varnish if needed.
- For resin/metal miniatures, check for loose parts periodically and re-glue as needed to prevent breakage.
Taking Care of Your Brushes
Good brushes can last a long time with the right cleaning routine in place.

- Avoid the Ferrule: Try not to dip your brush too deep into the paint. If paint gets into the metal ferrule, it dries there and slowly ruins the tip by forcing the bristles to splay out.
- Use Brush Soap: After each use, wash your brushes and then wash them again with a little brush soap. This will keep your brushes sharp and ready to paint.
- Proper Drying: When you dry your brushes, do not stand them up to dry if they are still wet. This will cause water to run down your handle and rot your handle or dissolve your adhesive. Instead, dry your brushes flat or with your tip pointing down.
- Brush Restorer: If your brush starts to get a little out of shape, you can use a special gel to restore your brush to a sharp, needle-like point.
Your Journey Starts Here
Every miniature you paint tells a story — not just of the character, but of your growth as a painter.
Your first model won't be perfect. Your tenth will be better. Your hundredth might surprise you.
So pick up your brush, thin your paints, and start bringing your miniatures to life.